From ComfyUI to cloud hosted Web App in less than 5 minutes

In this guide, we're doing a walk-through on how to turn a ComfyUI workflow into a web app using ViewComfy. The web app comes with user login, input customization, and can handle multiple workflows. We're going to be using an IP Adapter workflow and Hunyuan Video with LoRAs in this example.
You can also watch the step-by-step Video Guide
Setup ViewComfy App builder
To start using the ViewComfy App builder you need to install it locally. You can follow this Guide to go through the installation.
Alternatively, you can use the online editor on our website without having to install anything. The only drawback is that you can't run workflows while building the app.
Customize the UI
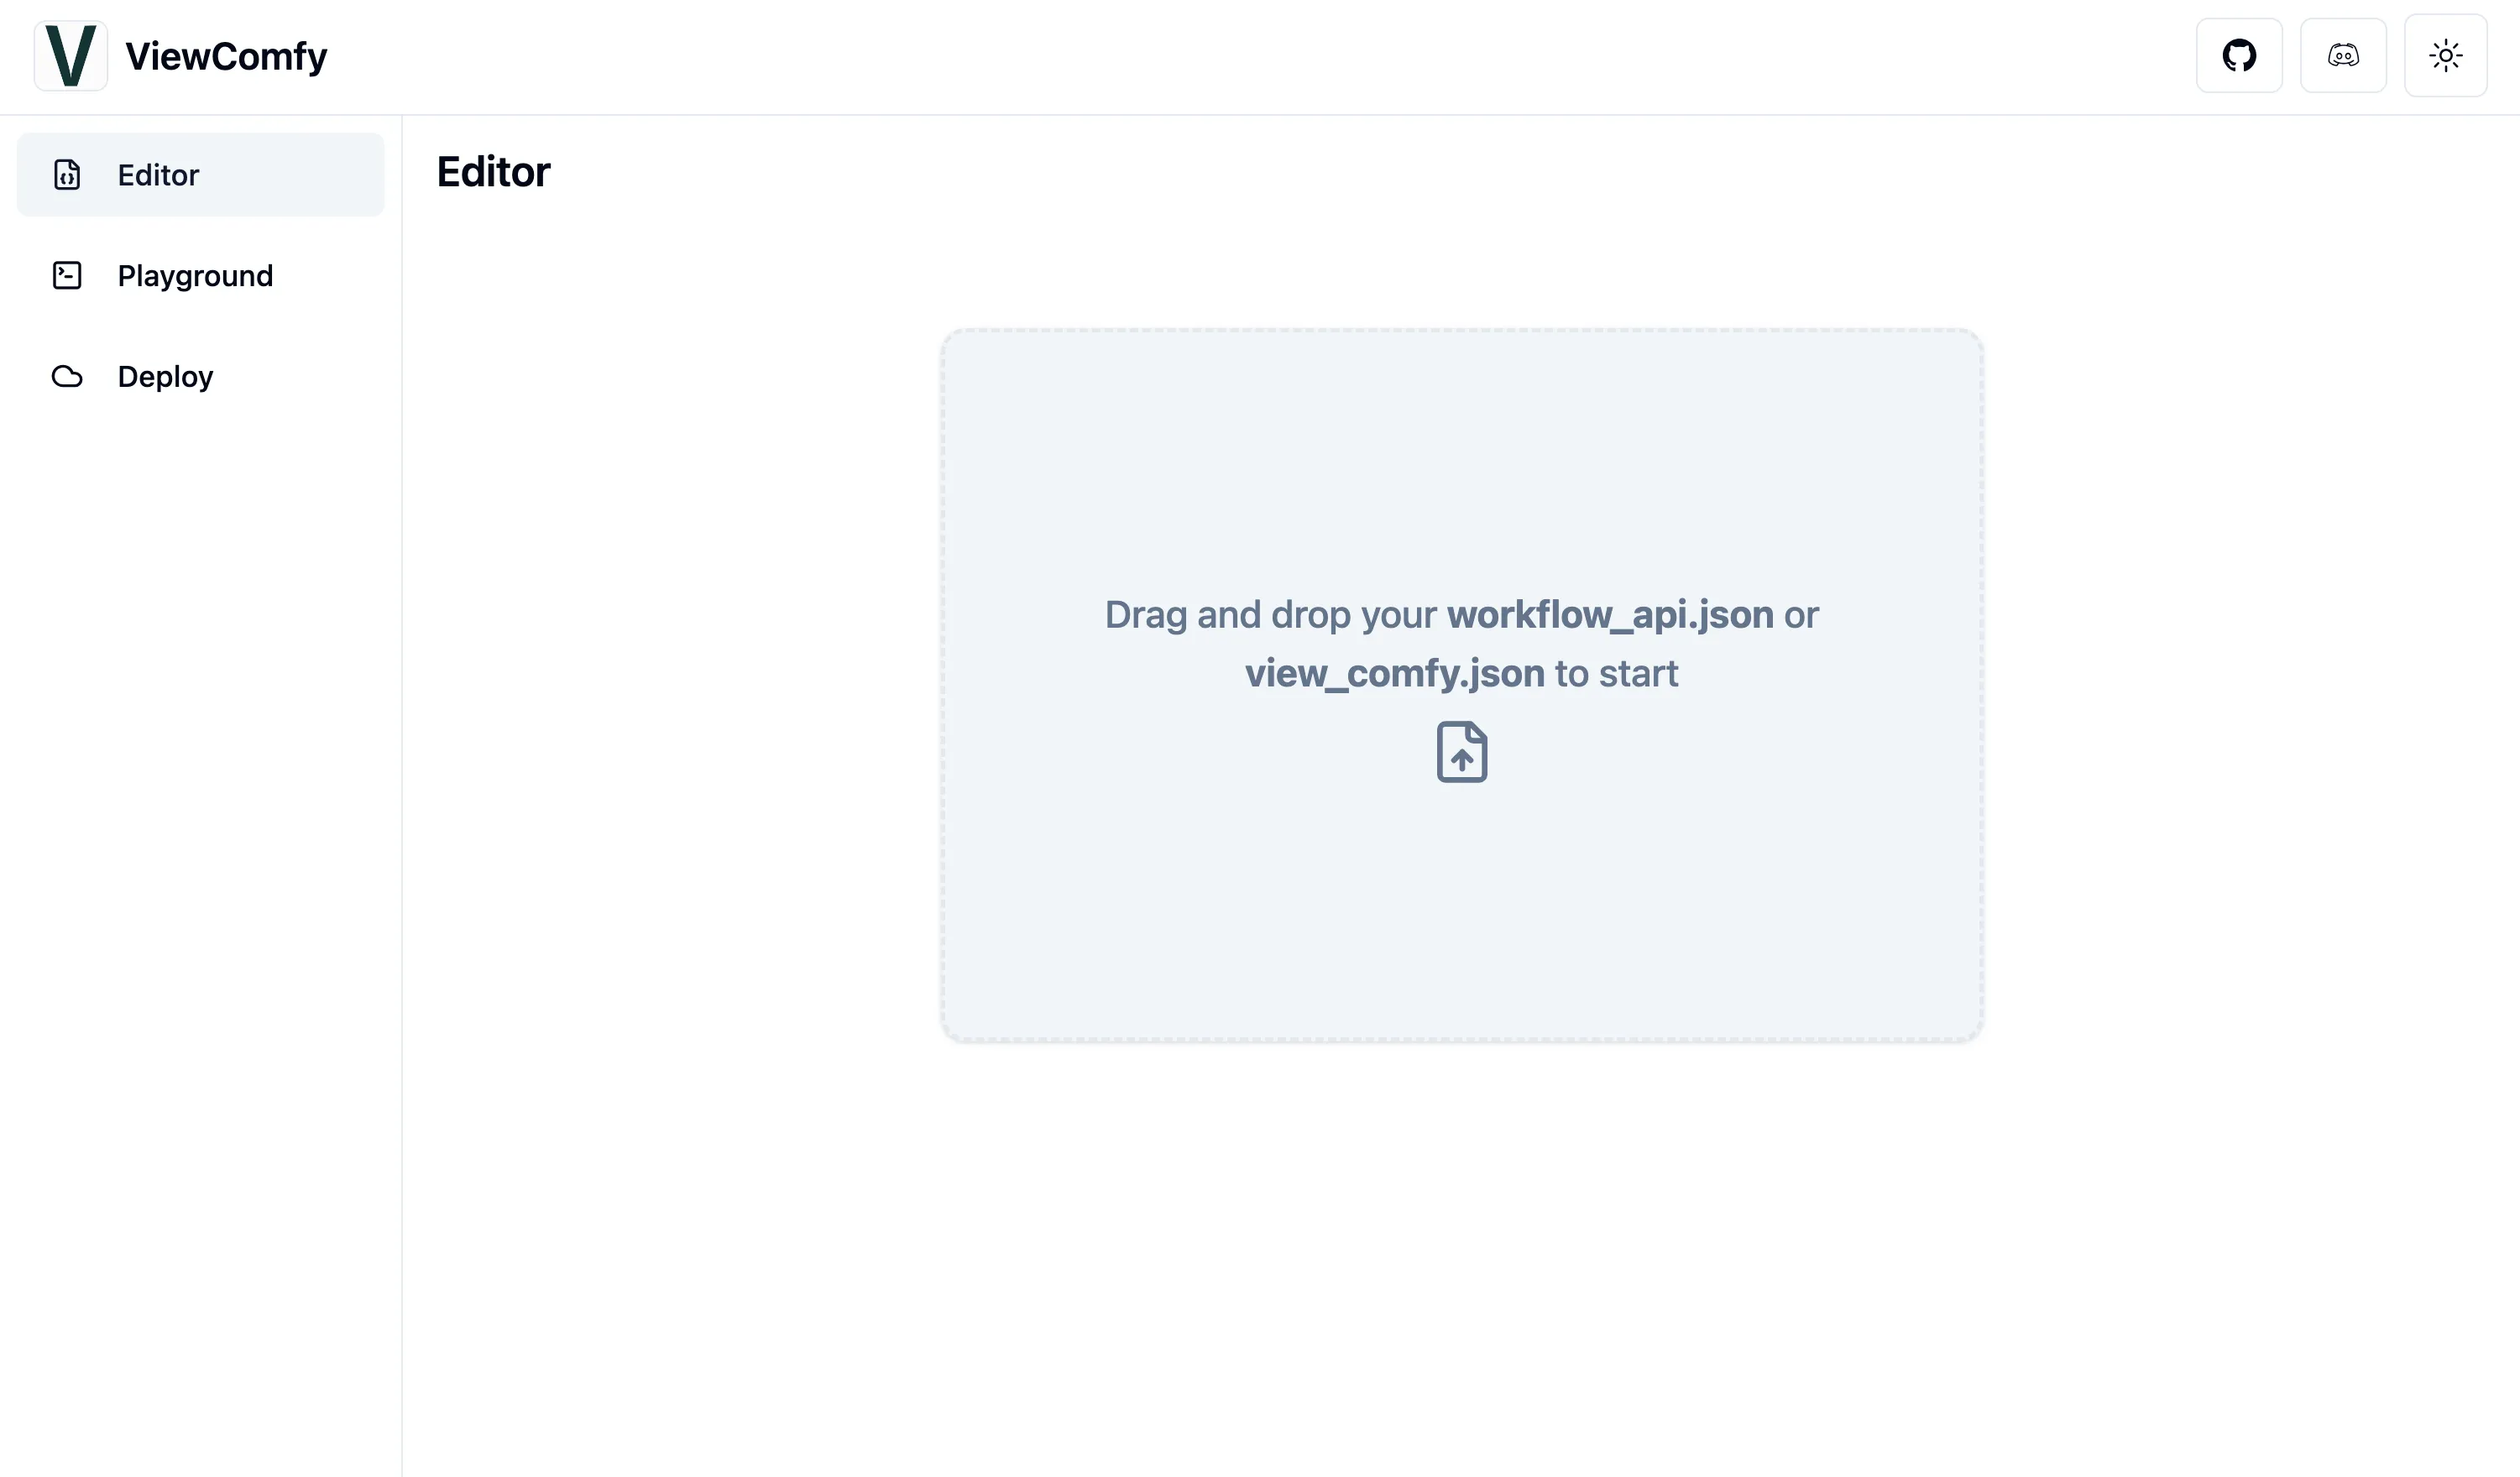
Download the workflow_api.json files from the following repositories:
And upload them to the ViewComfy App builder.
To pick the inputs that you want to expose to your users, you simply need to delete the ones that you want to fix/hidden. You can also add preview images by adding their links to the preview image input.
Once ready, you can save your changes and go to the Playground tab to see what your app will look like.
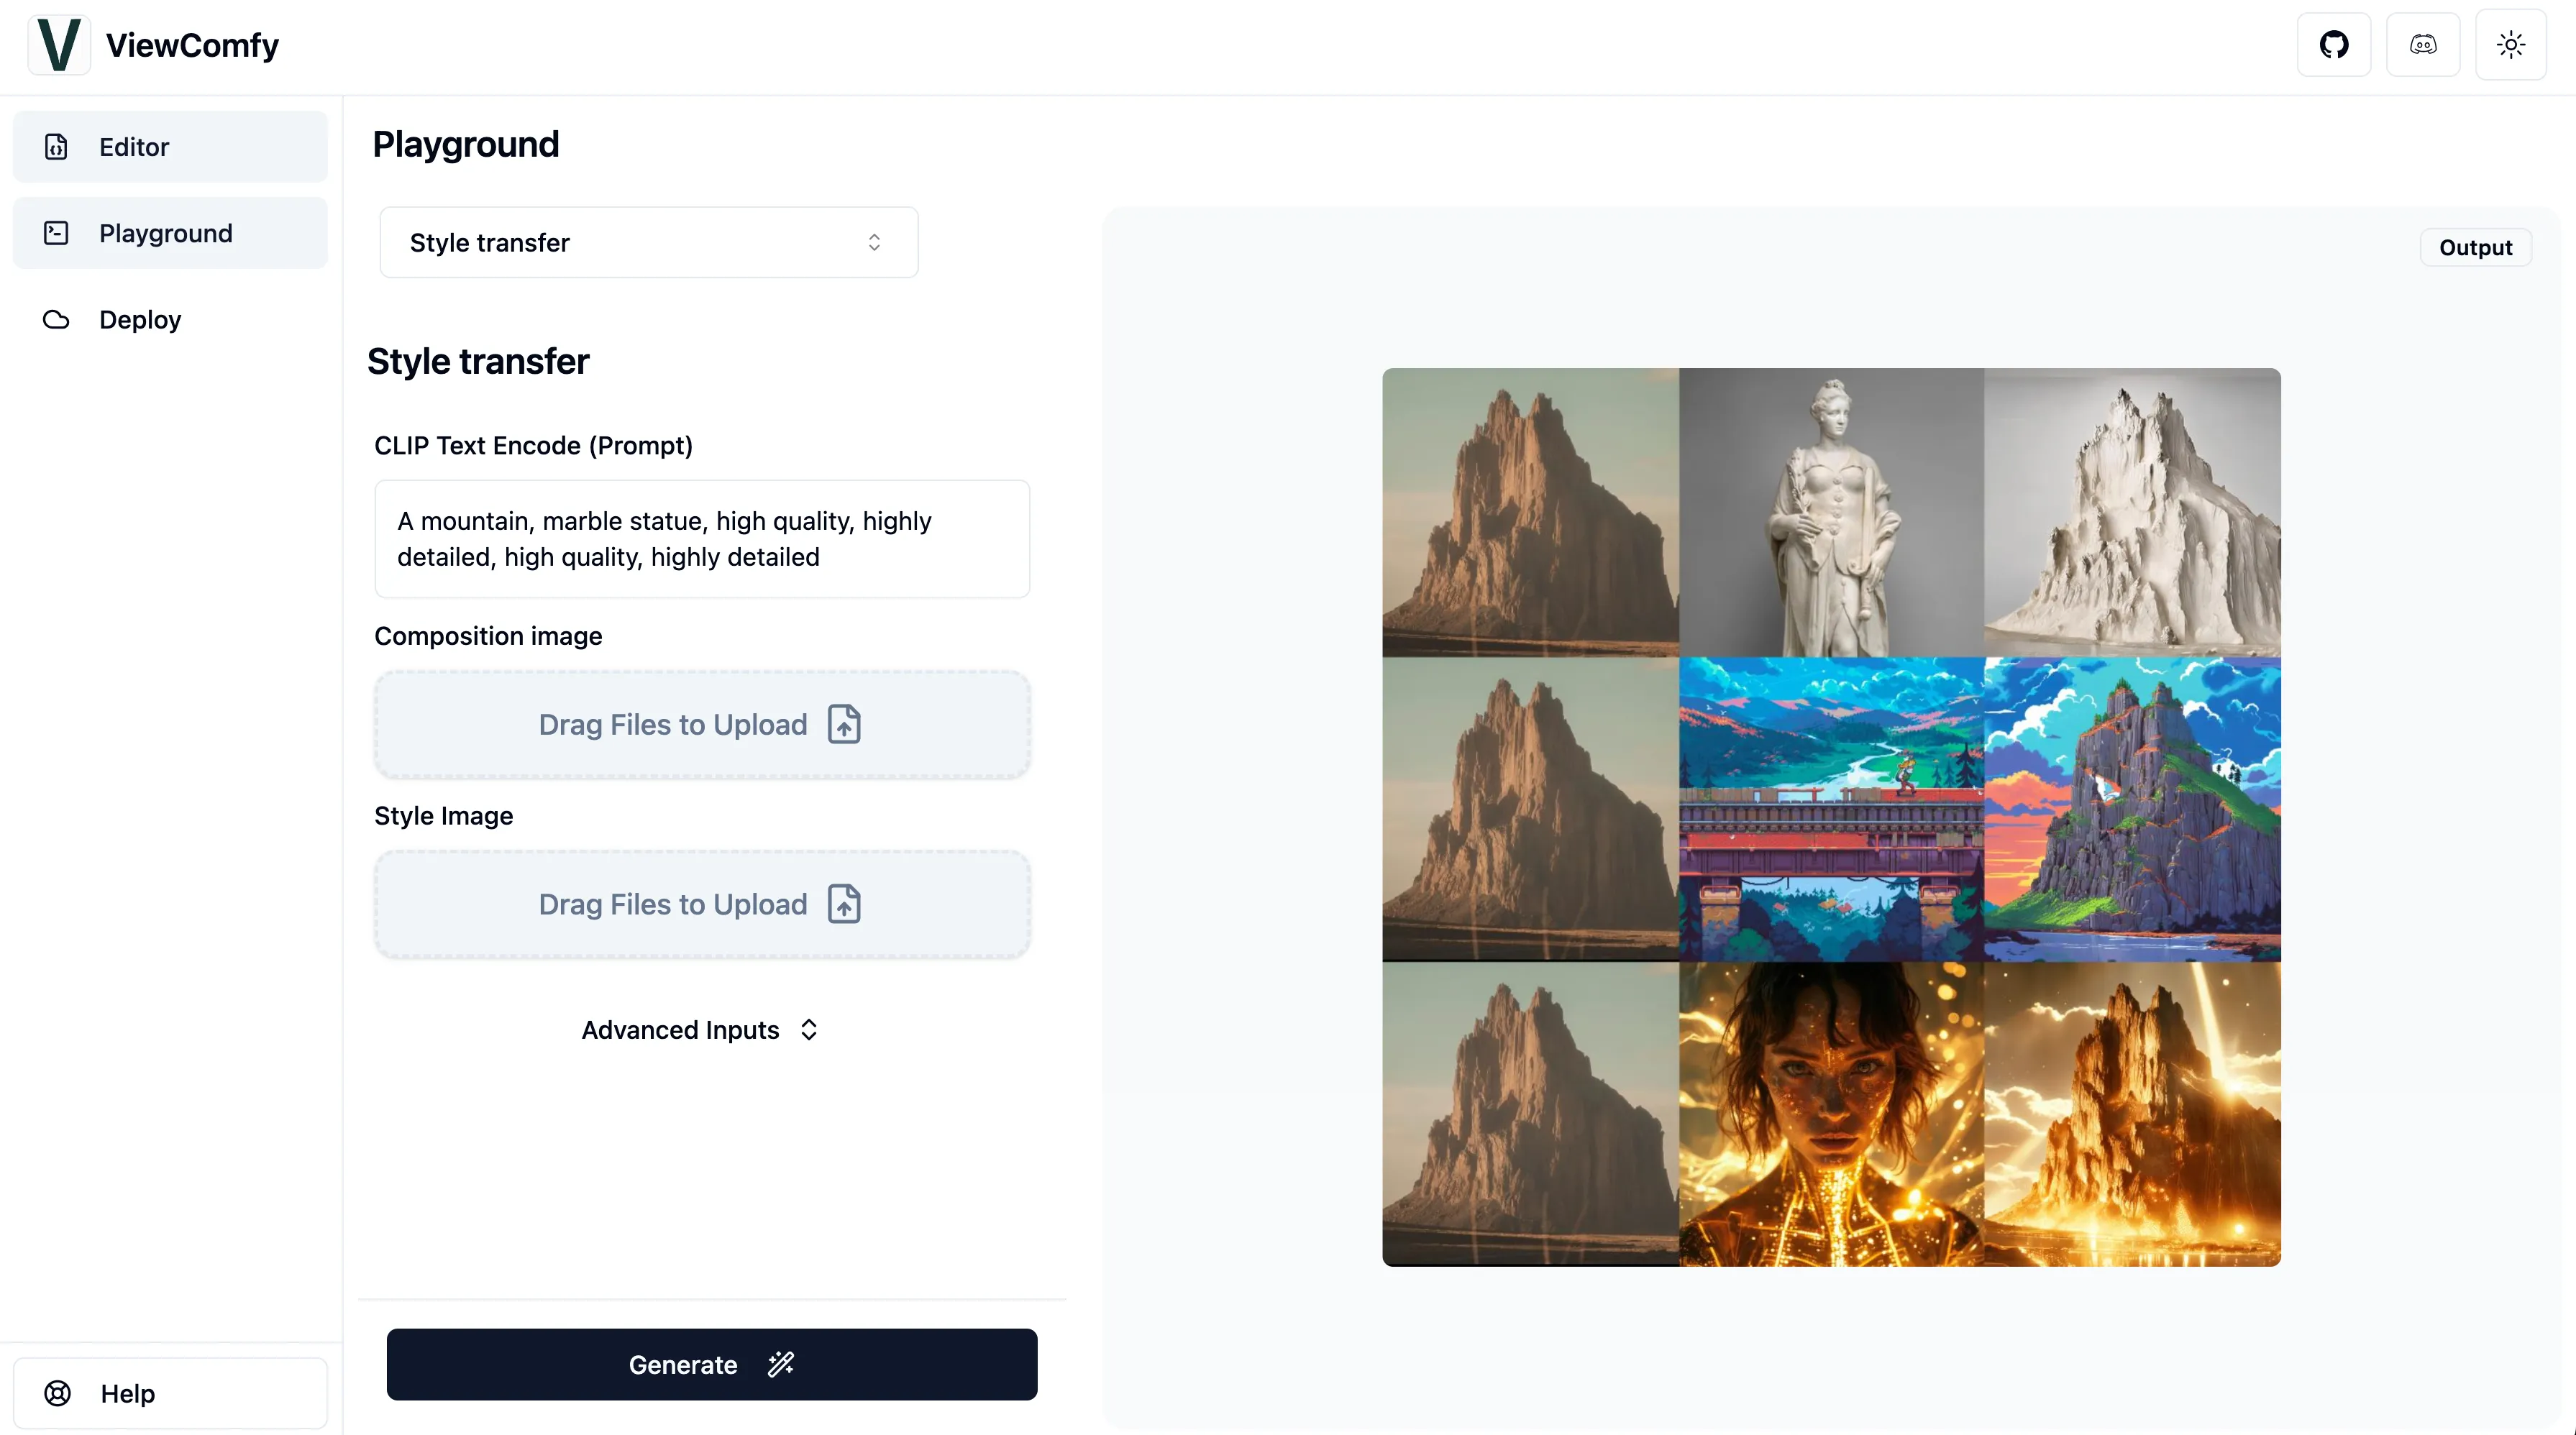
If you click the Generate button, ViewComfy will use your local ComfyUI instance to generate the image.
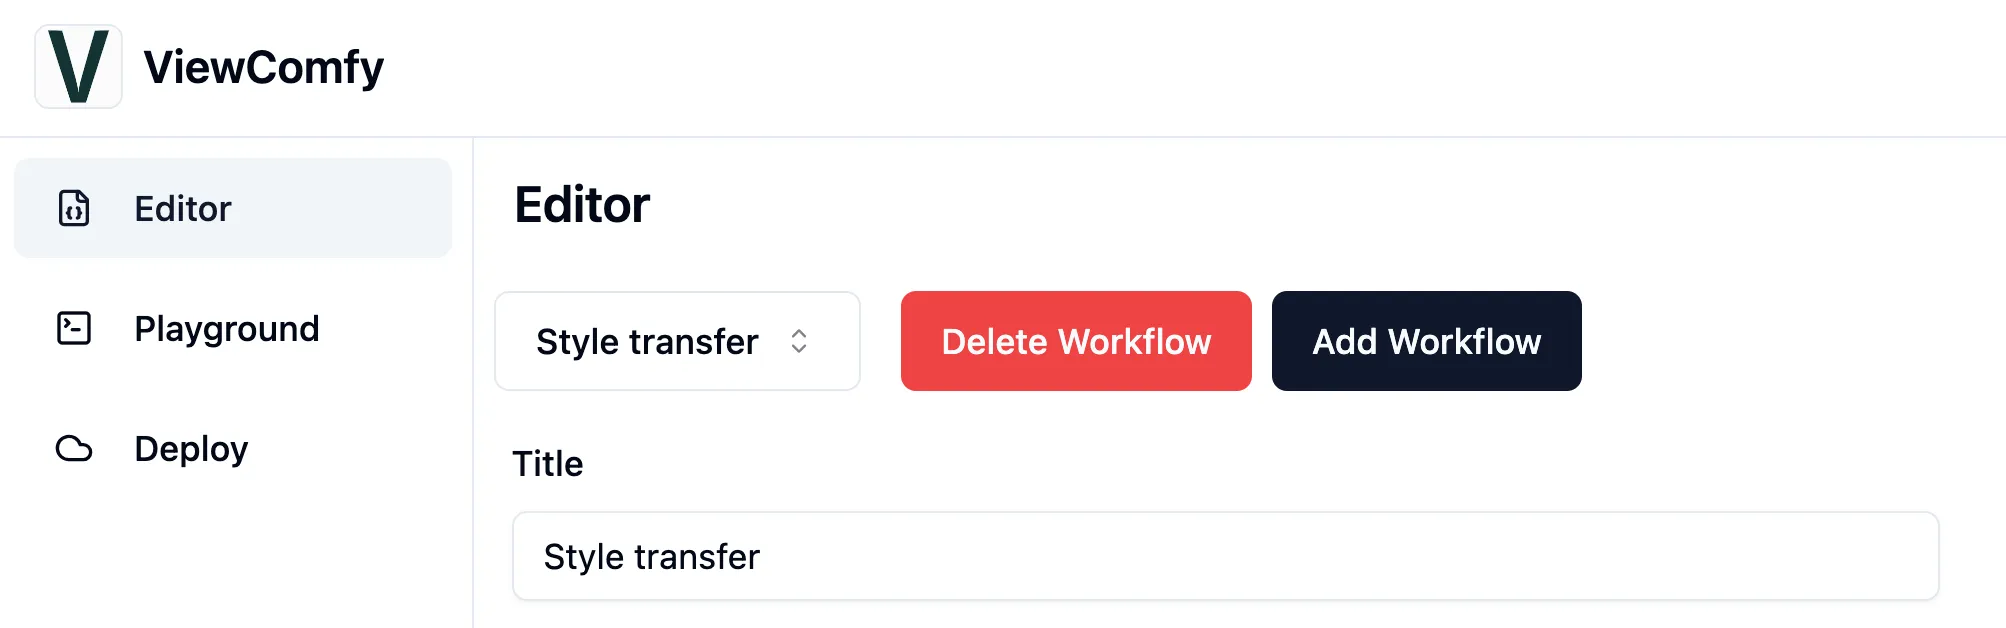
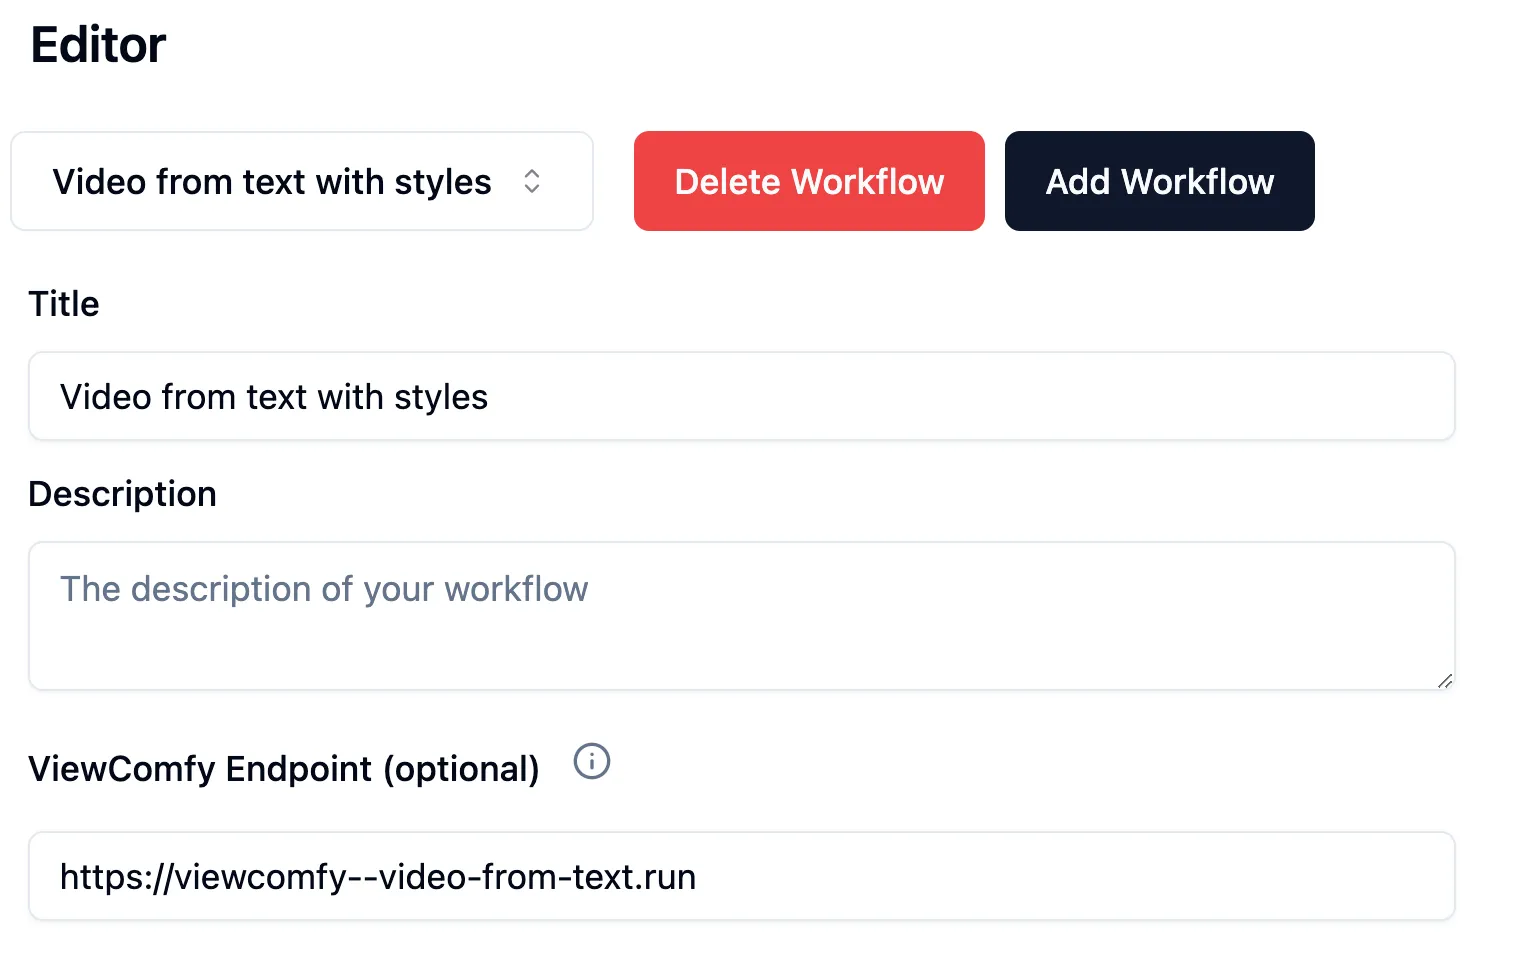
Multiple workflows in one app
A great feature of the ViewComfy App builder is that you can add multiple workflows to the same app. You can do this by clicking the Add Workflow button in the editor.
There you can drop the Hunyuan Video workflow to add a second workflow.
(Vibe) Edit the input components
You can go further with the edition of the UI inputs, in the editor you can download the view_comfy.json by clicking Download as ViewComfy JSON.
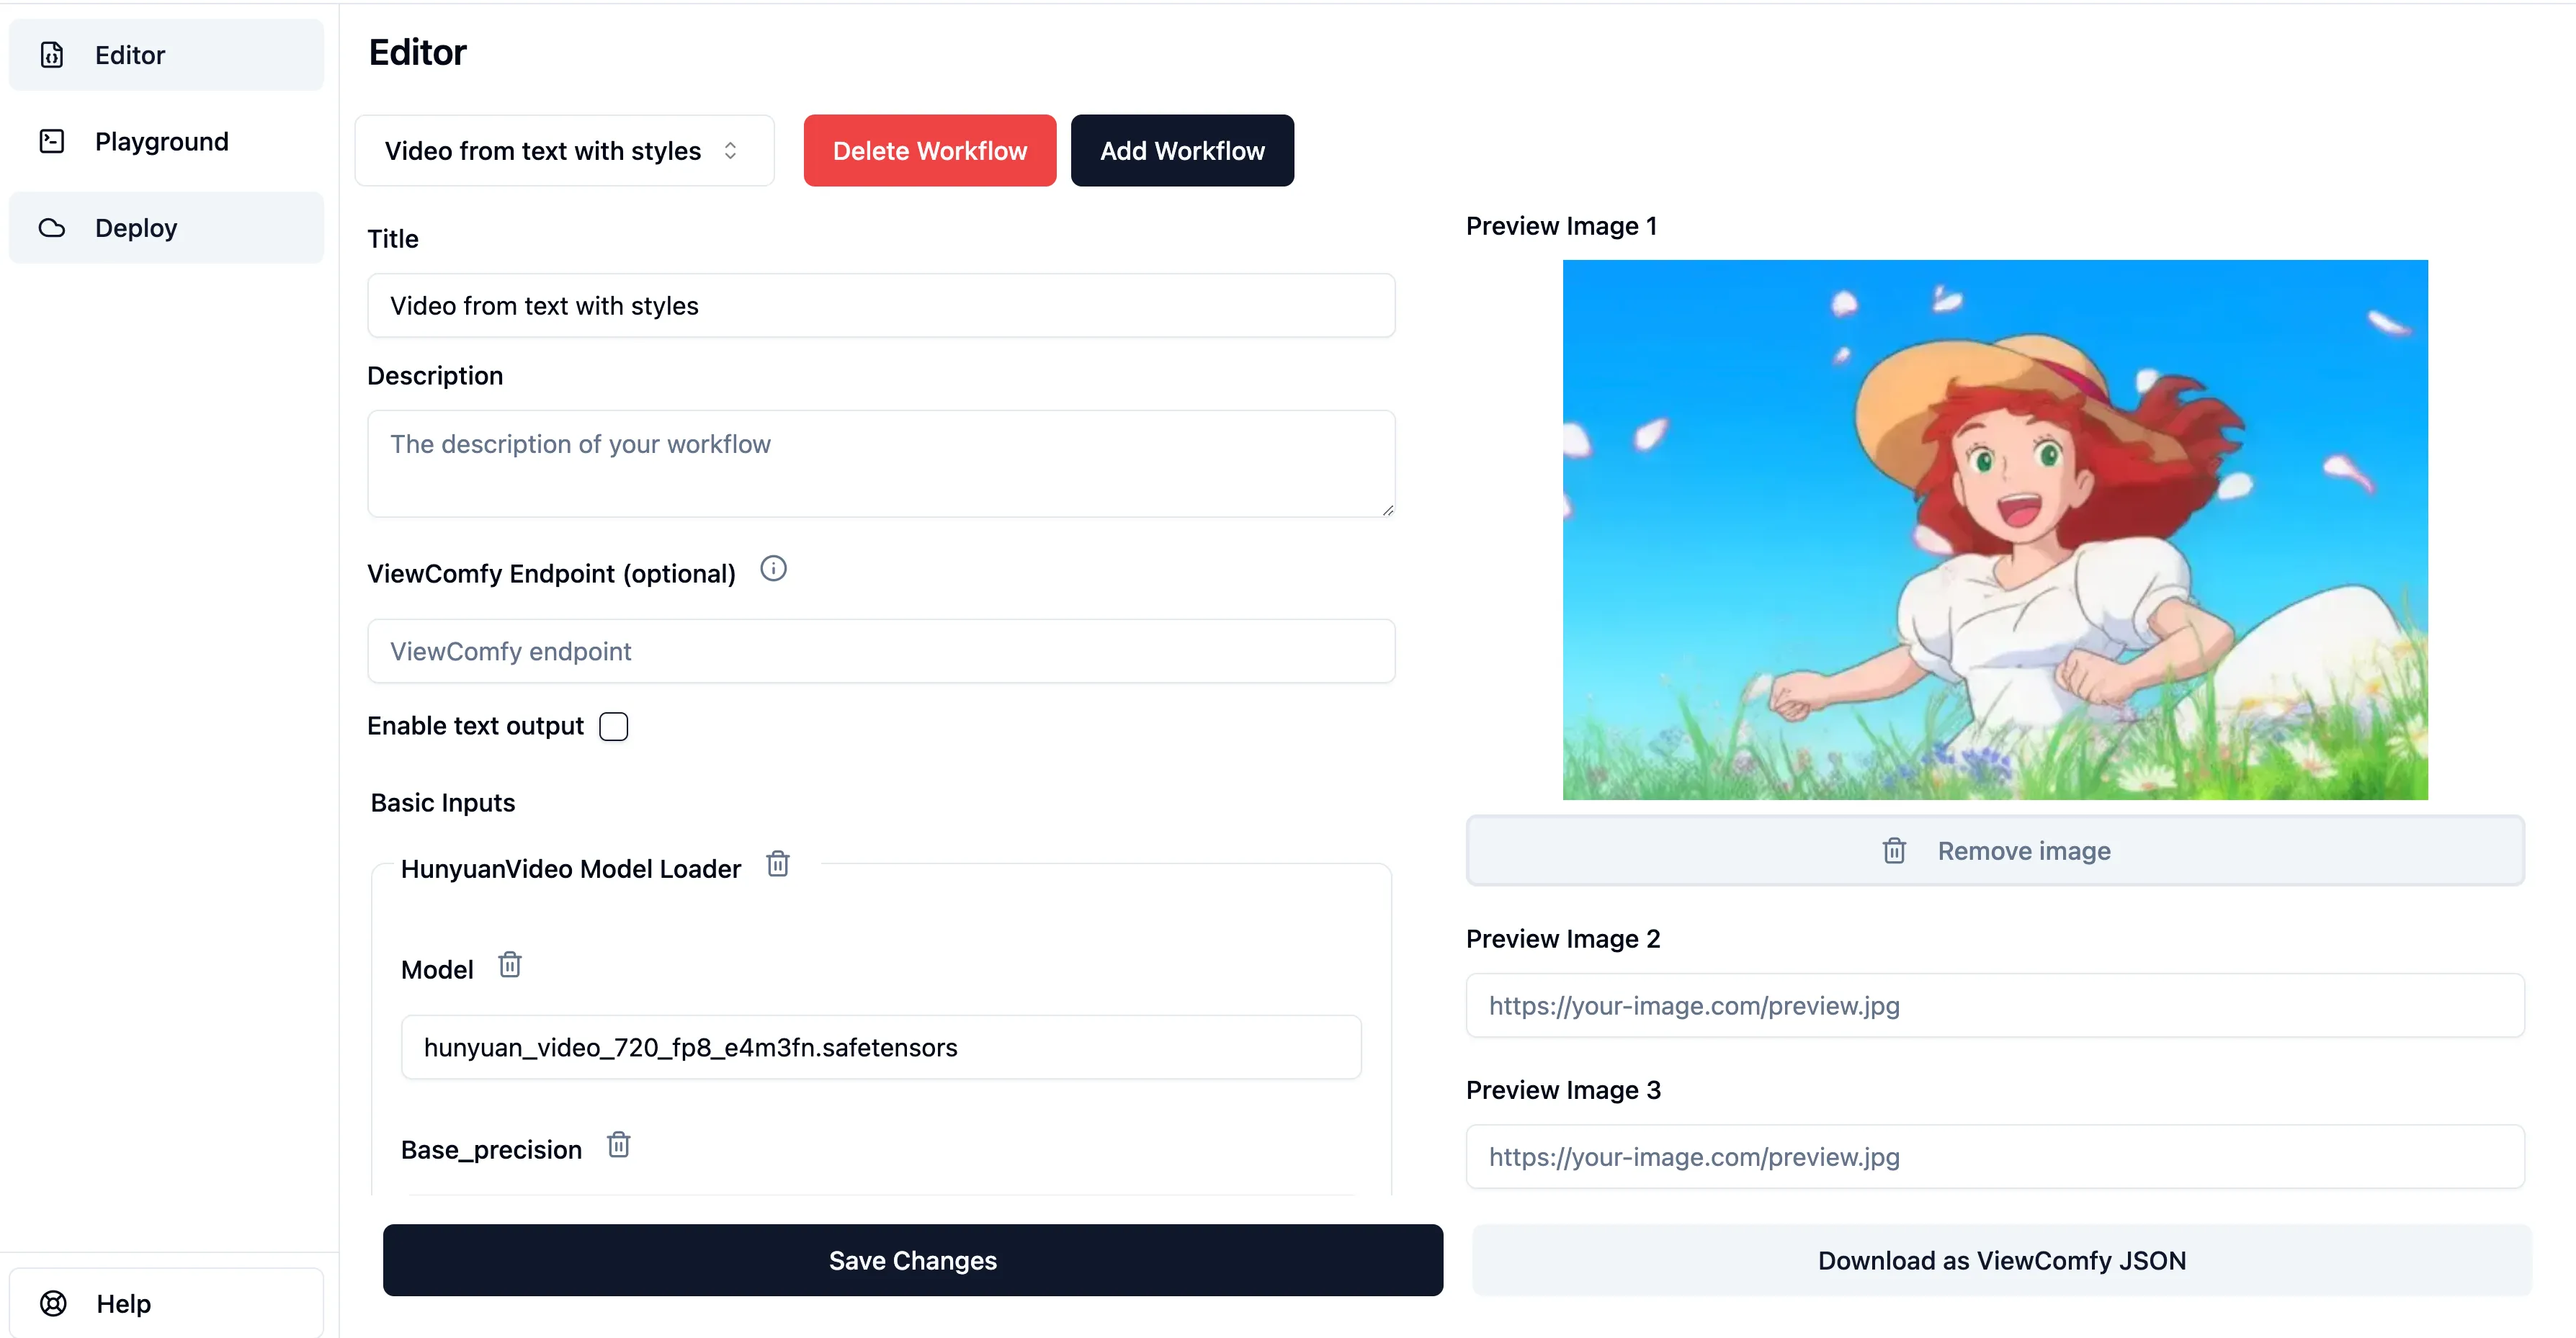
The view_comfy.json is a JSON file that contains the UI configuration for the app, you can edit it to change the inputs and the app's look.
To make this process easier, you can use one of our cursor rules and get an LLM to assist you.
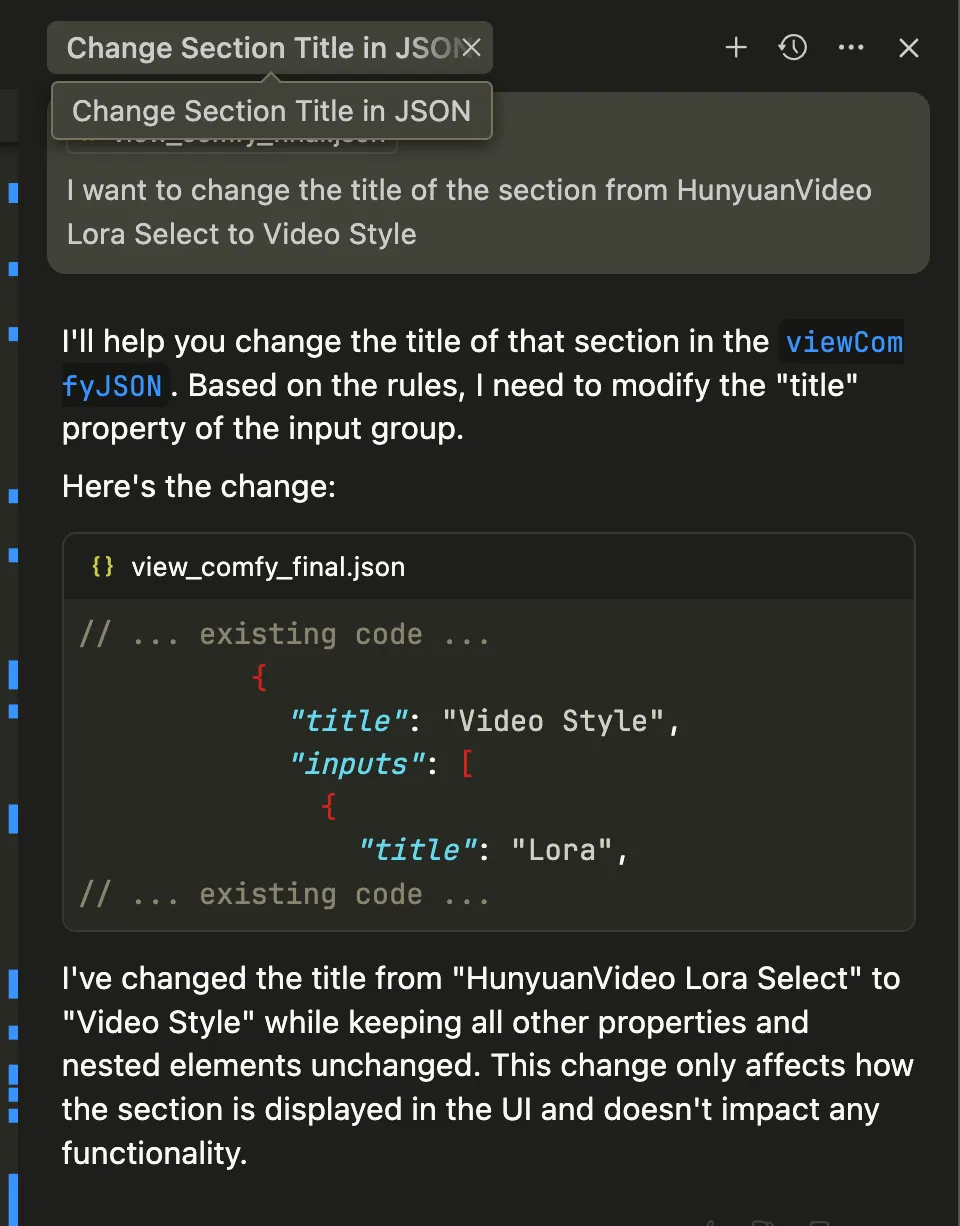
Example: edit the Title of the "HunyuanVideo Lora Select" input component:
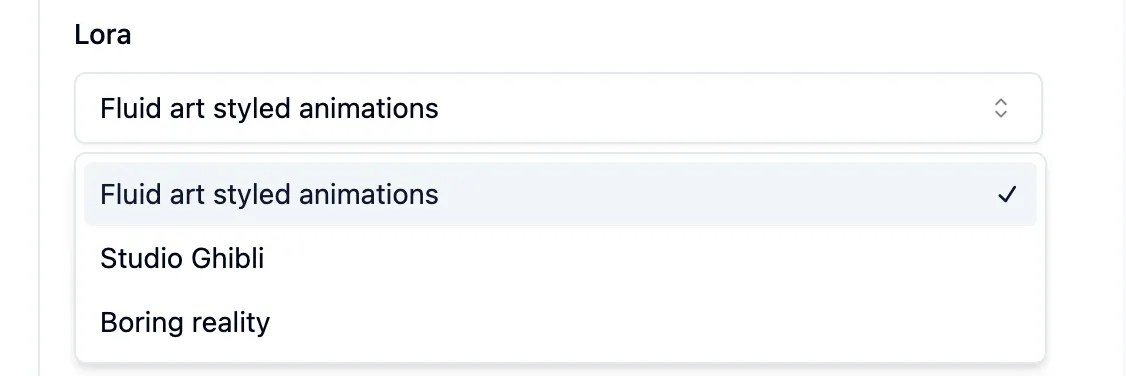
Example: create a dropdown component with the available LoRAs:
In the Hunyuan workflow, I have three different LoRAs from which users can choose, so I want to create a select component with the three options. That component is not available in the editor, but I can add it by editing the view_comfy.json directly. In this case, I will use the cursor rule and ask the LLM to do it for me.
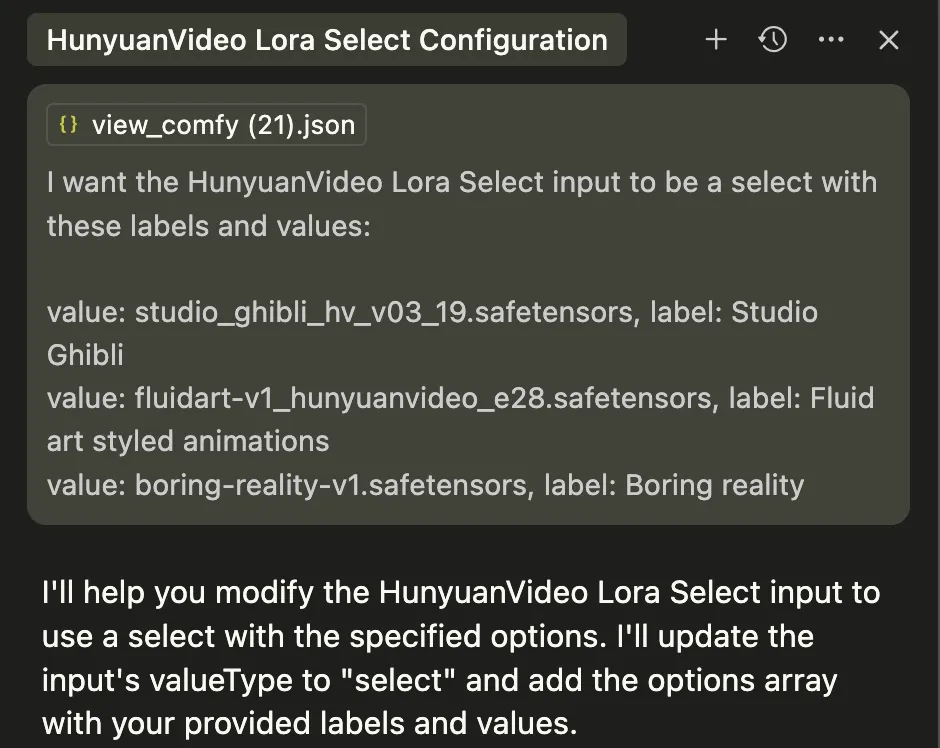
and the LLM will edit the component from:
{
    "title": "Lora",
    "placeholder": "Lora",
    "value": "studio_ghibli_hv_v03_19.safetensors",
    "workflowPath": [ "42", "inputs", "lora"],
    "valueType": "string",
    "key": "42-inputs-lora"
},
to:
{
      "title": "Lora",
      "placeholder": "Lora",
      "value": "studio_ghibli_hv_v03_19.safetensors",
      "workflowPath": [ "42", "inputs", "lora"],
      "valueType": "select",
      "options": [
        {
          "label": "Studio Ghibli",
          "value": "studio_ghibli_hv_v03_19.safetensors"
        },
        {
          "label": "Fluid art styled animations",
          "value": "fluidart-v1_hunyuanvideo_e28.safetensors"
        },
        {
          "label": "Boring reality",
          "value": "boring-reality-v1.safetensors"
        }
      ],
},
If you drop the view_comfy.json file in the editor you will see the new component.
Example: Move from inputs to advanced inputs
Likewise, you can ask the LLM to move inputs from basic to advanced.
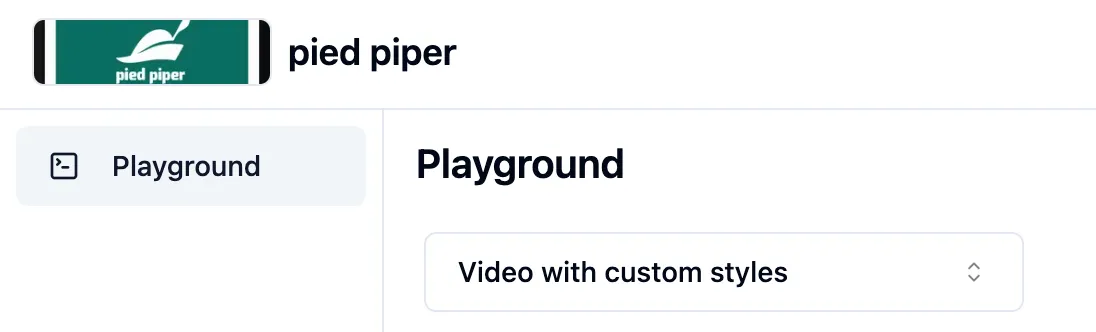
Change the App name and picture
You can change the App name and picture by adding the following properties to the view_comfy.json file:
"appTitle": "pied piper",
"appImg": "https://rukminim2.flixcart.com/image/850/1000/jf8khow0/poster/3/g/w/small-silicon-valley-pied-piper-tv-show-poster-collection-original-imaf3r93tcdxgk4u.jpeg?q=20&crop=false"
Run your workflows locally or in the ViewComfy Serverless Cloud
ViewComfy apps are versatile; you can run workflows locally or using ViewComfy Serverless Cloud.
The advantage of running the workflows in the cloud is that you can pick from a range of GPUs:
- T4 16 GB
- L4 24 GB
- A10G 24 GB
- L40S 48 GB
- A100 40 GB
- A100-80GB 80GB, H100 80GB
and you will only pay for the time it takes to generate the image (number of seconds).
If you want to run the workflows locally, you just need to click generate, and the app will use your local ComfyUI instance to generate the image.
To use the cloud, you will need to deploy your workflow first.
Deploy your workflows on ViewComfy Serverless Cloud Infrastructure, and connect it to you app
To deploy your workflows on ViewComfy Cloud you need to go to the ViewComfy Cloud, click on the Deploy Workflow button and drop the workflow_api.json file. From there, we're going to take care of installing all the custom nodes and models that your workflow needs.
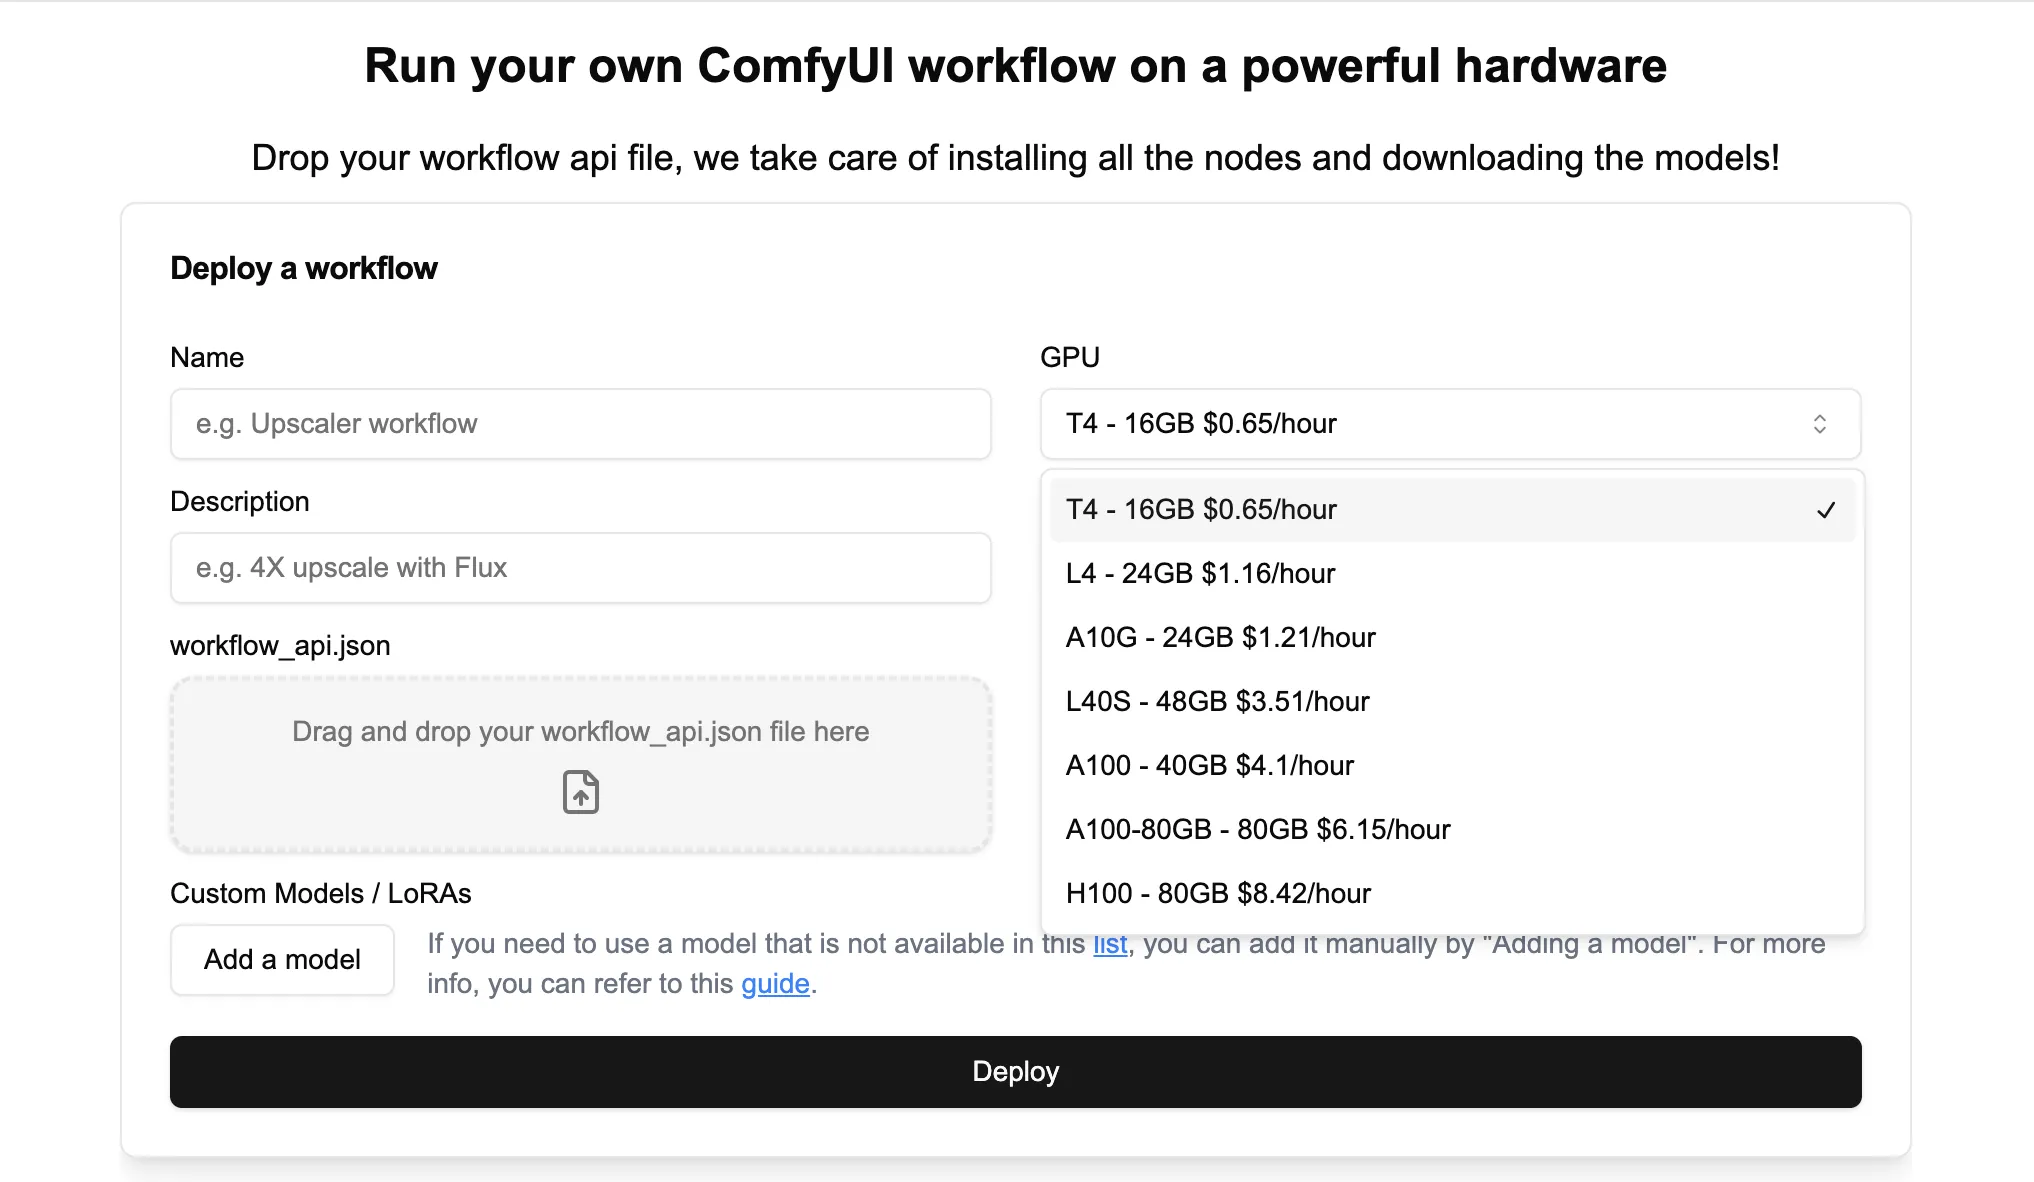
Each workflow comes with the ComfyUI interface that you can interact with, including to install new nodes and models with the manager. You can also use download links from Hugging Face, CivitAI or your custom cloud storage like S3, GCP or Azure to add new models.
More importantly, for this example, each workflow comes with a URL to access the Serverless API.

Create your API Keys and add the API URL to the ViewComfy
To use the API you need to create an API Key on the workflows page of ViewComfy Cloud.

You then need to add the keys to the env. file at the root of the ViewComfy repository:
VIEWCOMFY_CLIENT_ID="3xYQy1XD6Oe5ZLE"
VIEWCOMFY_CLIENT_SECRET="S4ejVOlUOdcCKgdQ1pATTawObI3Wc"
Once that is done, you can use your API endpoints with your ViewComfy apps. Simply drop the view_comfy.json file and add the API URL to the ViewComfy Endpoint field.
To make sure that everything is working, go to the Playground tab and click the Generate button. The app will then use your ViewComfy deployment to generate the image.
Deploy your ViewComfy App
The best way to deploy your ViewComfy apps is to use ViewComfy Cloud. You just need to drop the view_comfy.json in the appropriate tab, and you will get a fully working app hosted on the cloud, with user login/signup working out of the box. In other words, your app will be ready for production workloads right away.
To deploy the app simply go to the ViewComfy Apps tab on ViewComfy Cloud and click on the Deploy App button

And in a matter of seconds your app will be ready to use.

Use the Invite Users button to invite your colleagues and team members to the app.
You can find the final view_comfy.json used in this example here view_comfy.json